Art Talk
All About Stippling
School has wrapped up for the year, but the last few weeks were a chaotic mess and, as a result, I did not get much writing done. So, you guys get an art talk this month instead.
Stippling
Those of you that follow my Instagram account, @creative_purrsuits, are likely familiar with the word, but I’ve had many people asking questions about it lately.
Stippling is generally considered a shading technique where an artist uses dots to create an image that appears three dimensional. I use ink, but the medium can vary. I have seen pencil drawings, spray painted murals, and even paper collages using the technique.
Patience Is Key
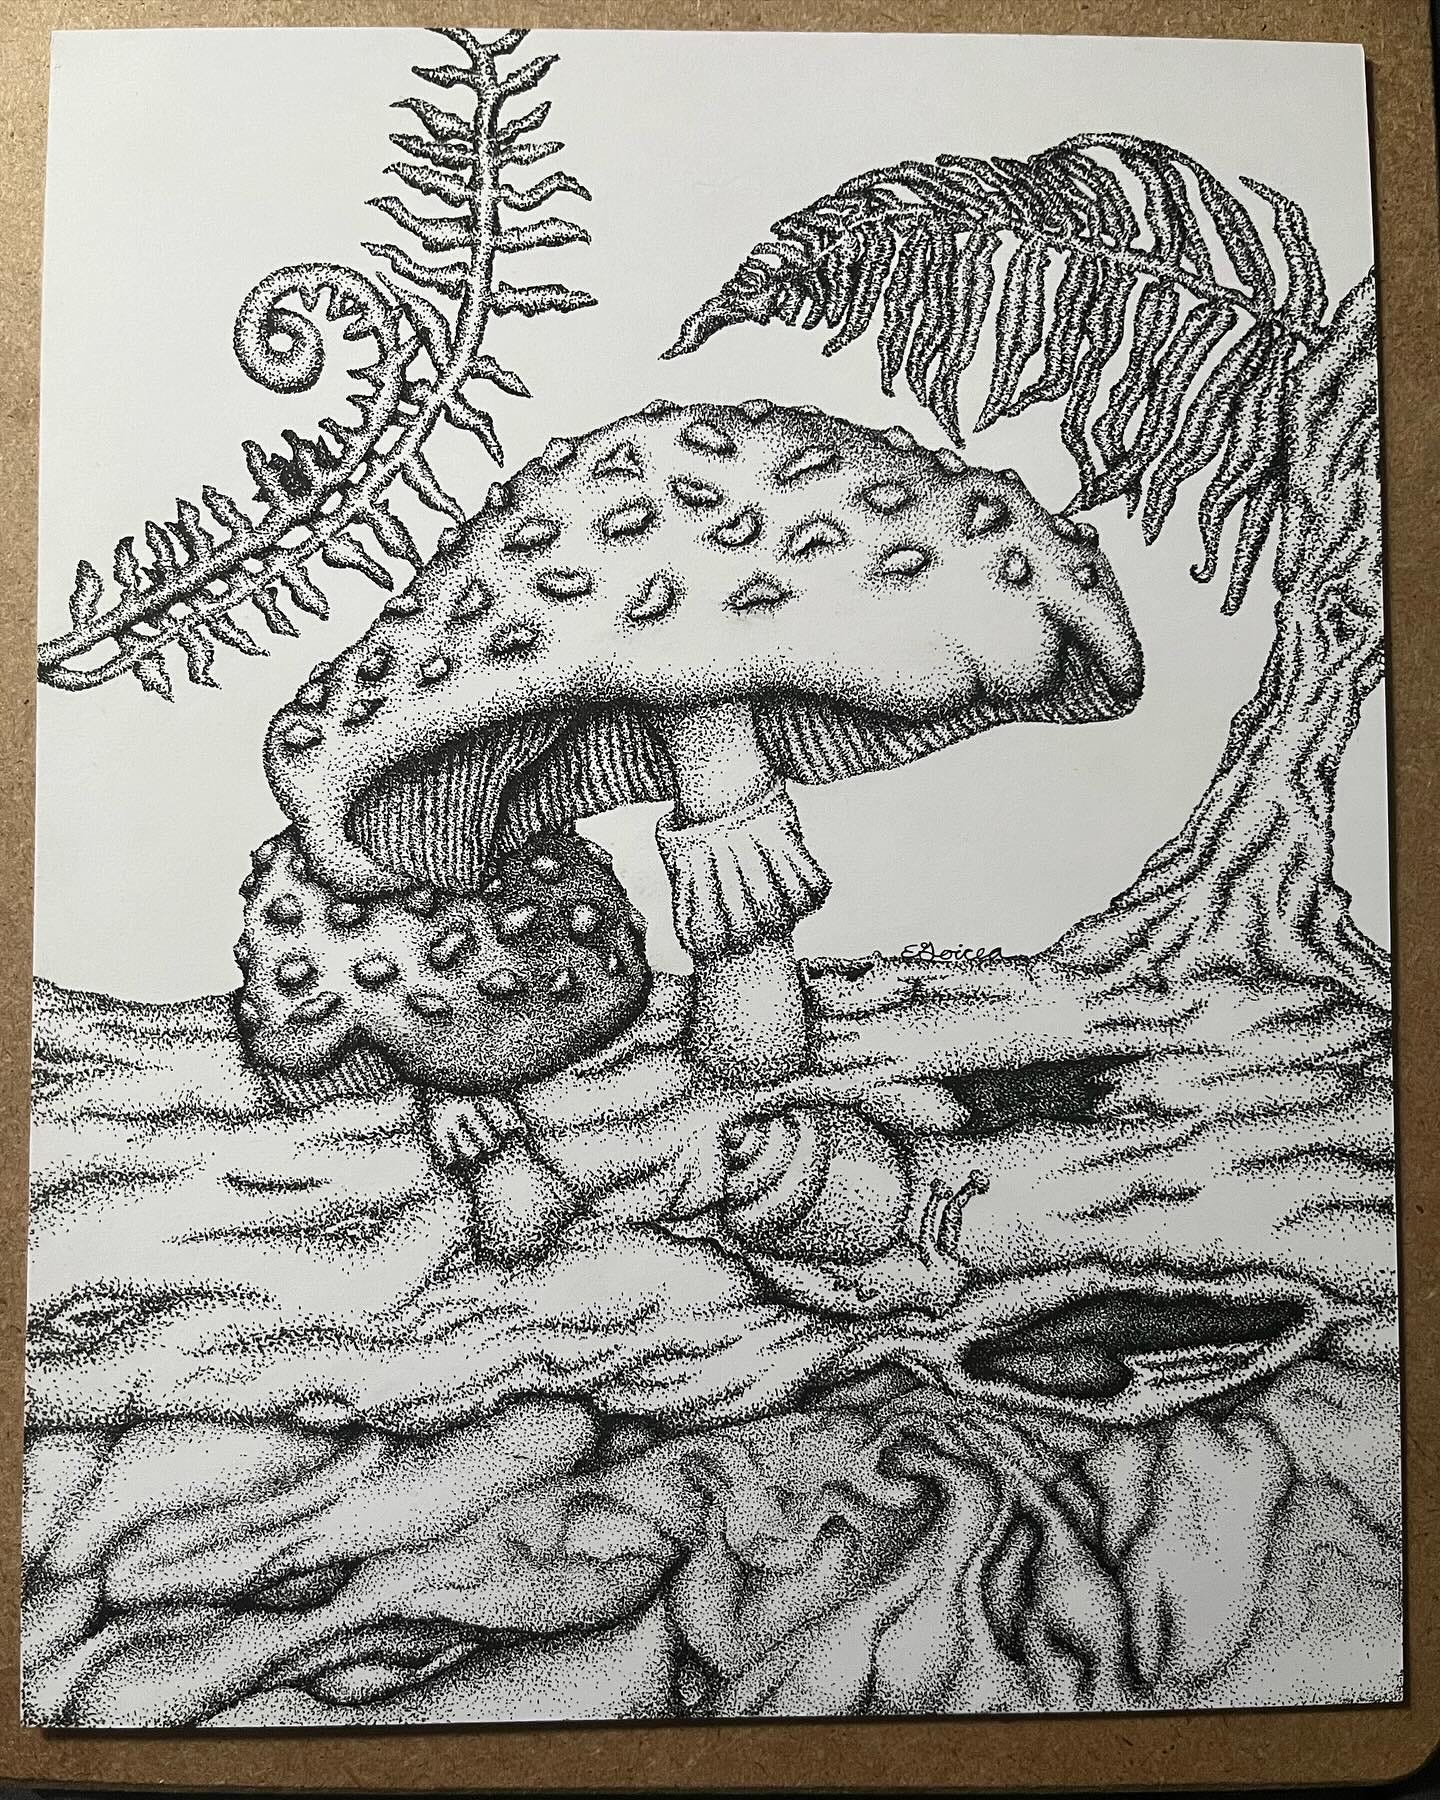
Stippling is not for those short on time or patience. When I shade a pencil, charcoal, or pastel piece, even larger ones, it is usually done in a couple hours. Most of my smaller works with stippling, like the above piece, can take 8 to 10 hours to complete.
Larger pieces take much longer. The 8x10” one below took me 23.5 hours to complete over about eight months. Granted, it likely would have been done much sooner, but I only worked on it for roughly 1.5 hours once a week while my son was attending his STEAM class.
Fair warning though, this technique works your entire arm and, if you aren’t diligent with breaks, can cause some pretty frustrating and painful cramps in your fingers, wrist, arm, and even shoulder. I generally can only work for 2 hours before needing a break to shake the stiffness out. I have learned the hard way not to push that limit and believe me when I say taking a 10-minute break is much better than being out of commission a week with carpal tunnel-like pain.
An Acquired Taste
Believe it or not, I used to hate stippling. The tediousness of tapping and the fact my dots seemed to always be lined up like perfect soldiers annoyed me greatly. However, I think a lot of my issues came from the fact I was not at all comfortable working in ink. I was very stiff and hesitant with it and the work that resulted showed that quite clearly.
After participating in multiple Inktobers, I finally got comfortable with using my Micron pens. I revisited stippling after seeing a fellow Inktober artist doing amazing stippling pieces and discovered it wasn’t so horrible anymore. I started small, with 2x2” doodles to practice making my dots not quite so stiff. It’s not easy finding the right balance of control and organic freeform, but once you discover what works for you it becomes almost second nature. For me, I tend to work in one inch sections and move in a W-shape that prevents me from ending up with lined up ant soldiers. I also tend to do single, precise dots wherever I see a gap I don’t want, much like scanning for typos in a document.
How one stipples a piece is a matter of taste. You can do a little, leaving lots of white space or you can go to the other extreme and barely leave any white. As you can tell from the above piece, I tend towards the latter.
Stippling vs Pointillism
A few people (my husband included) have said something along the lines of, “isn’t it pointillism?” Pointillism, as defined by Wikipedia, is “a technique of painting in which small, distinct dots of color are applied in patterns to form an image.” So it is similar to stippling in the use of dots to create an image, but as I don’t use paint and my pieces lack color, I don’t view them as pointillism.
I may at some point experiment with colored dots, perhaps using my Prismacolor markers, but for now I like working in black and white. I would not have thought I’d be doing stippling pieces even a year ago, so I can’t dismiss the possibility of doing colored pieces in the future, be it a year or a decade from now.
Step By Step Process
I’ve gotten asked quite often how I go about making a stippling piece, so I’ll share that here for those curious.
First, I decide what to draw and oftentimes this is THE hardest part. I personally really like nature so flowers, animals, and such will usually be what I decide to draw.
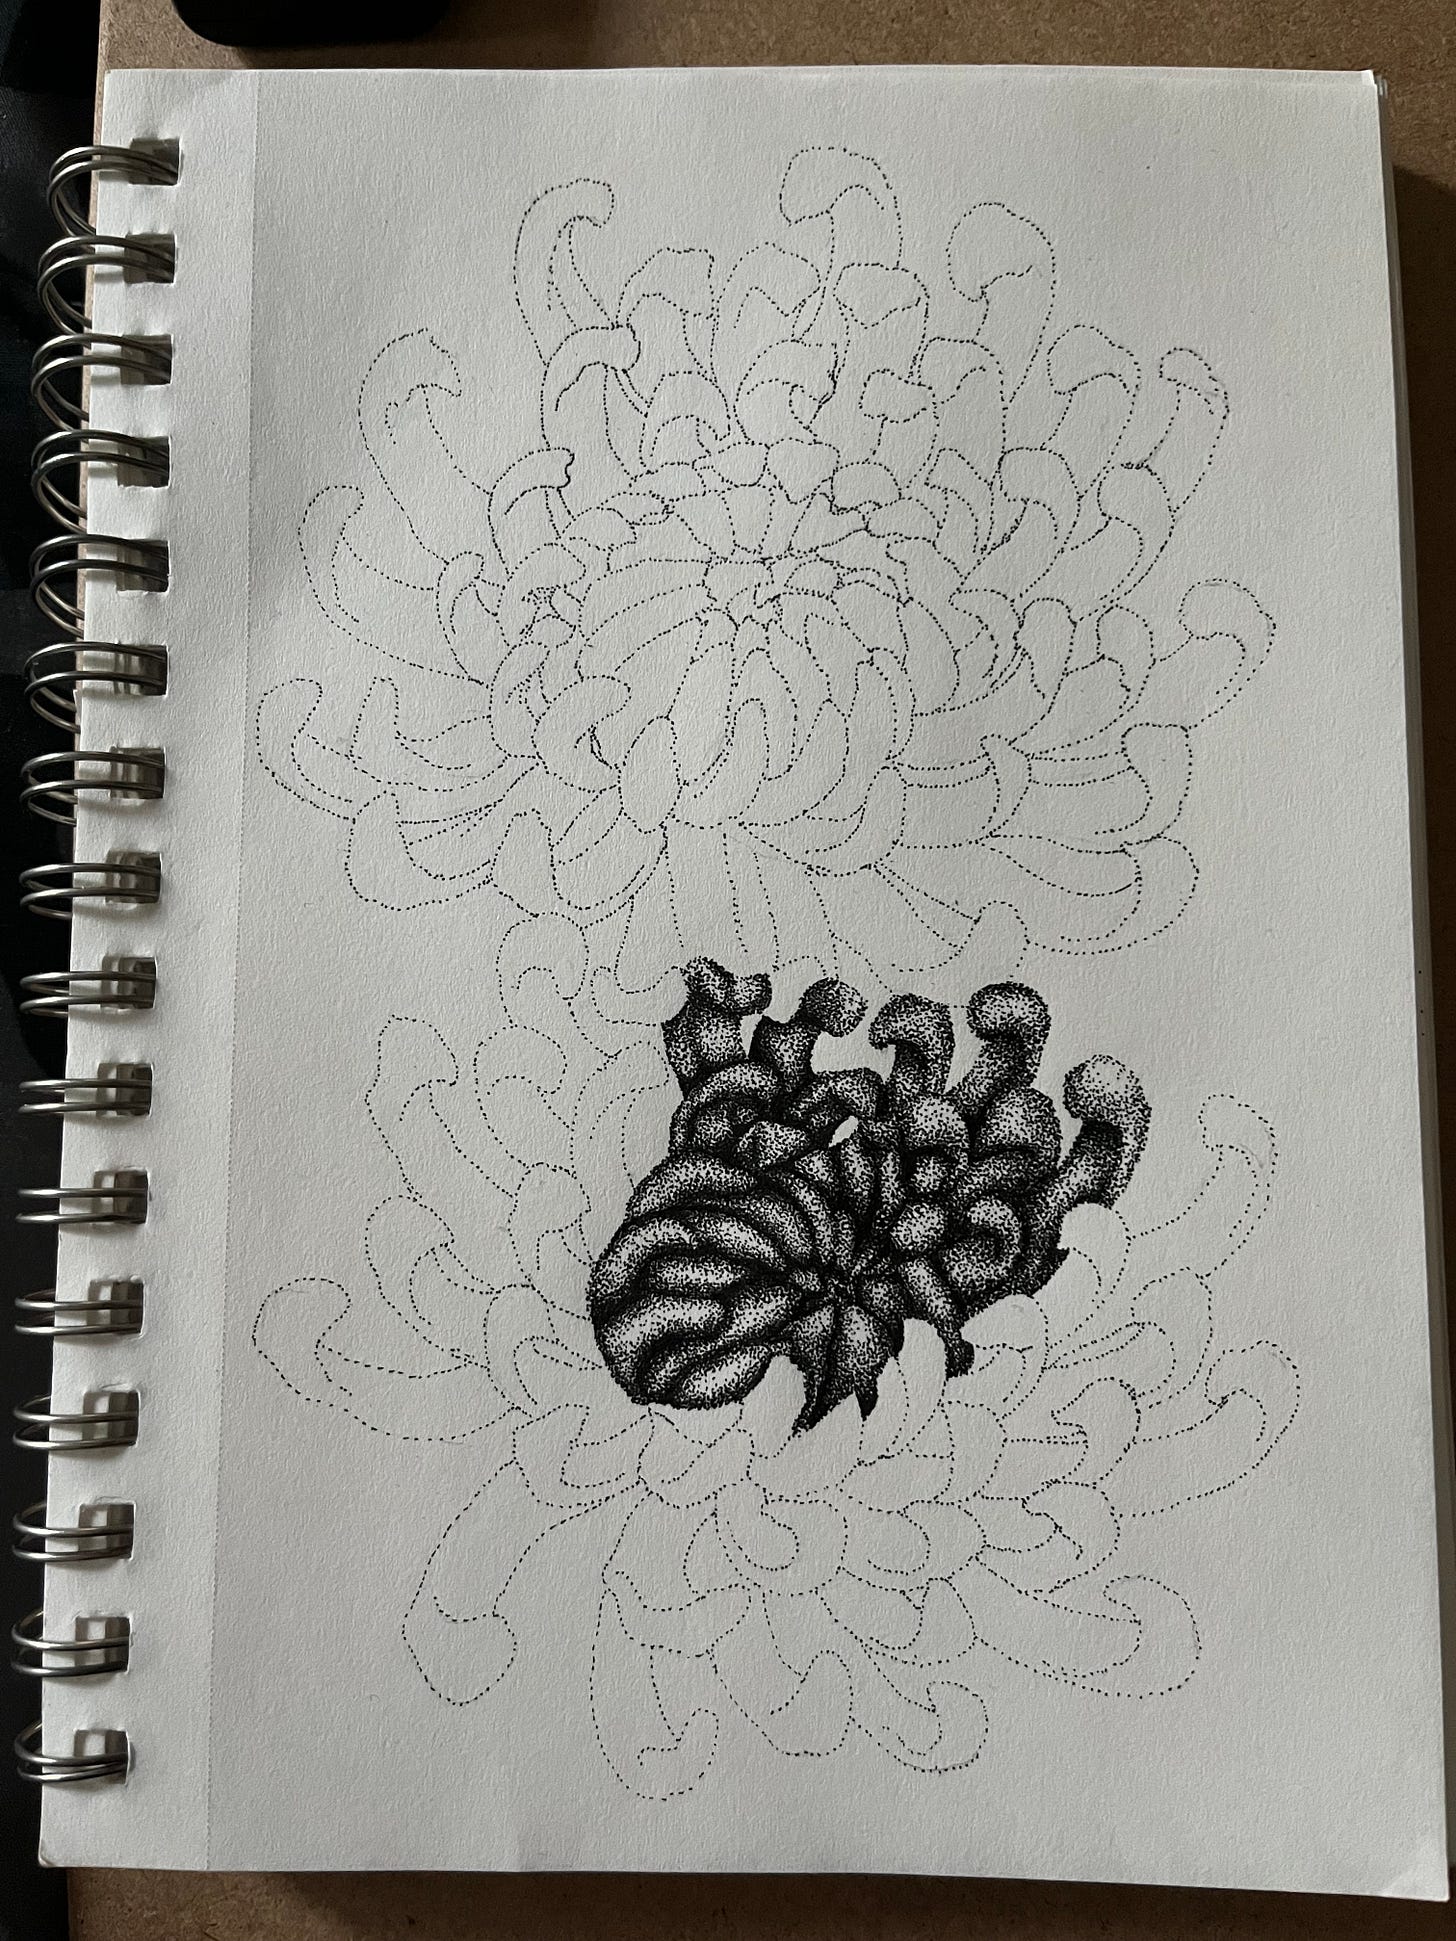
Next, I grab my iPad and start browsing Google or my photo library for one or more photos of what I’m planning to draw. In the case of the below work in progress, I used photos of my Mother’s Day 2016 mums as a reference.
Then, I sketch a rough outline in pencil. It’s not usually the neatest of sketches, but I tidy it up in the following step, switching to ink.
Once I have my sketch, I begin stippling. This is a very controlled and steady tapping as I go over the lines I want, adjusting as needed. I will typically wait an hour before erasing the pencil lines to ensure I don’t smudge the ink.
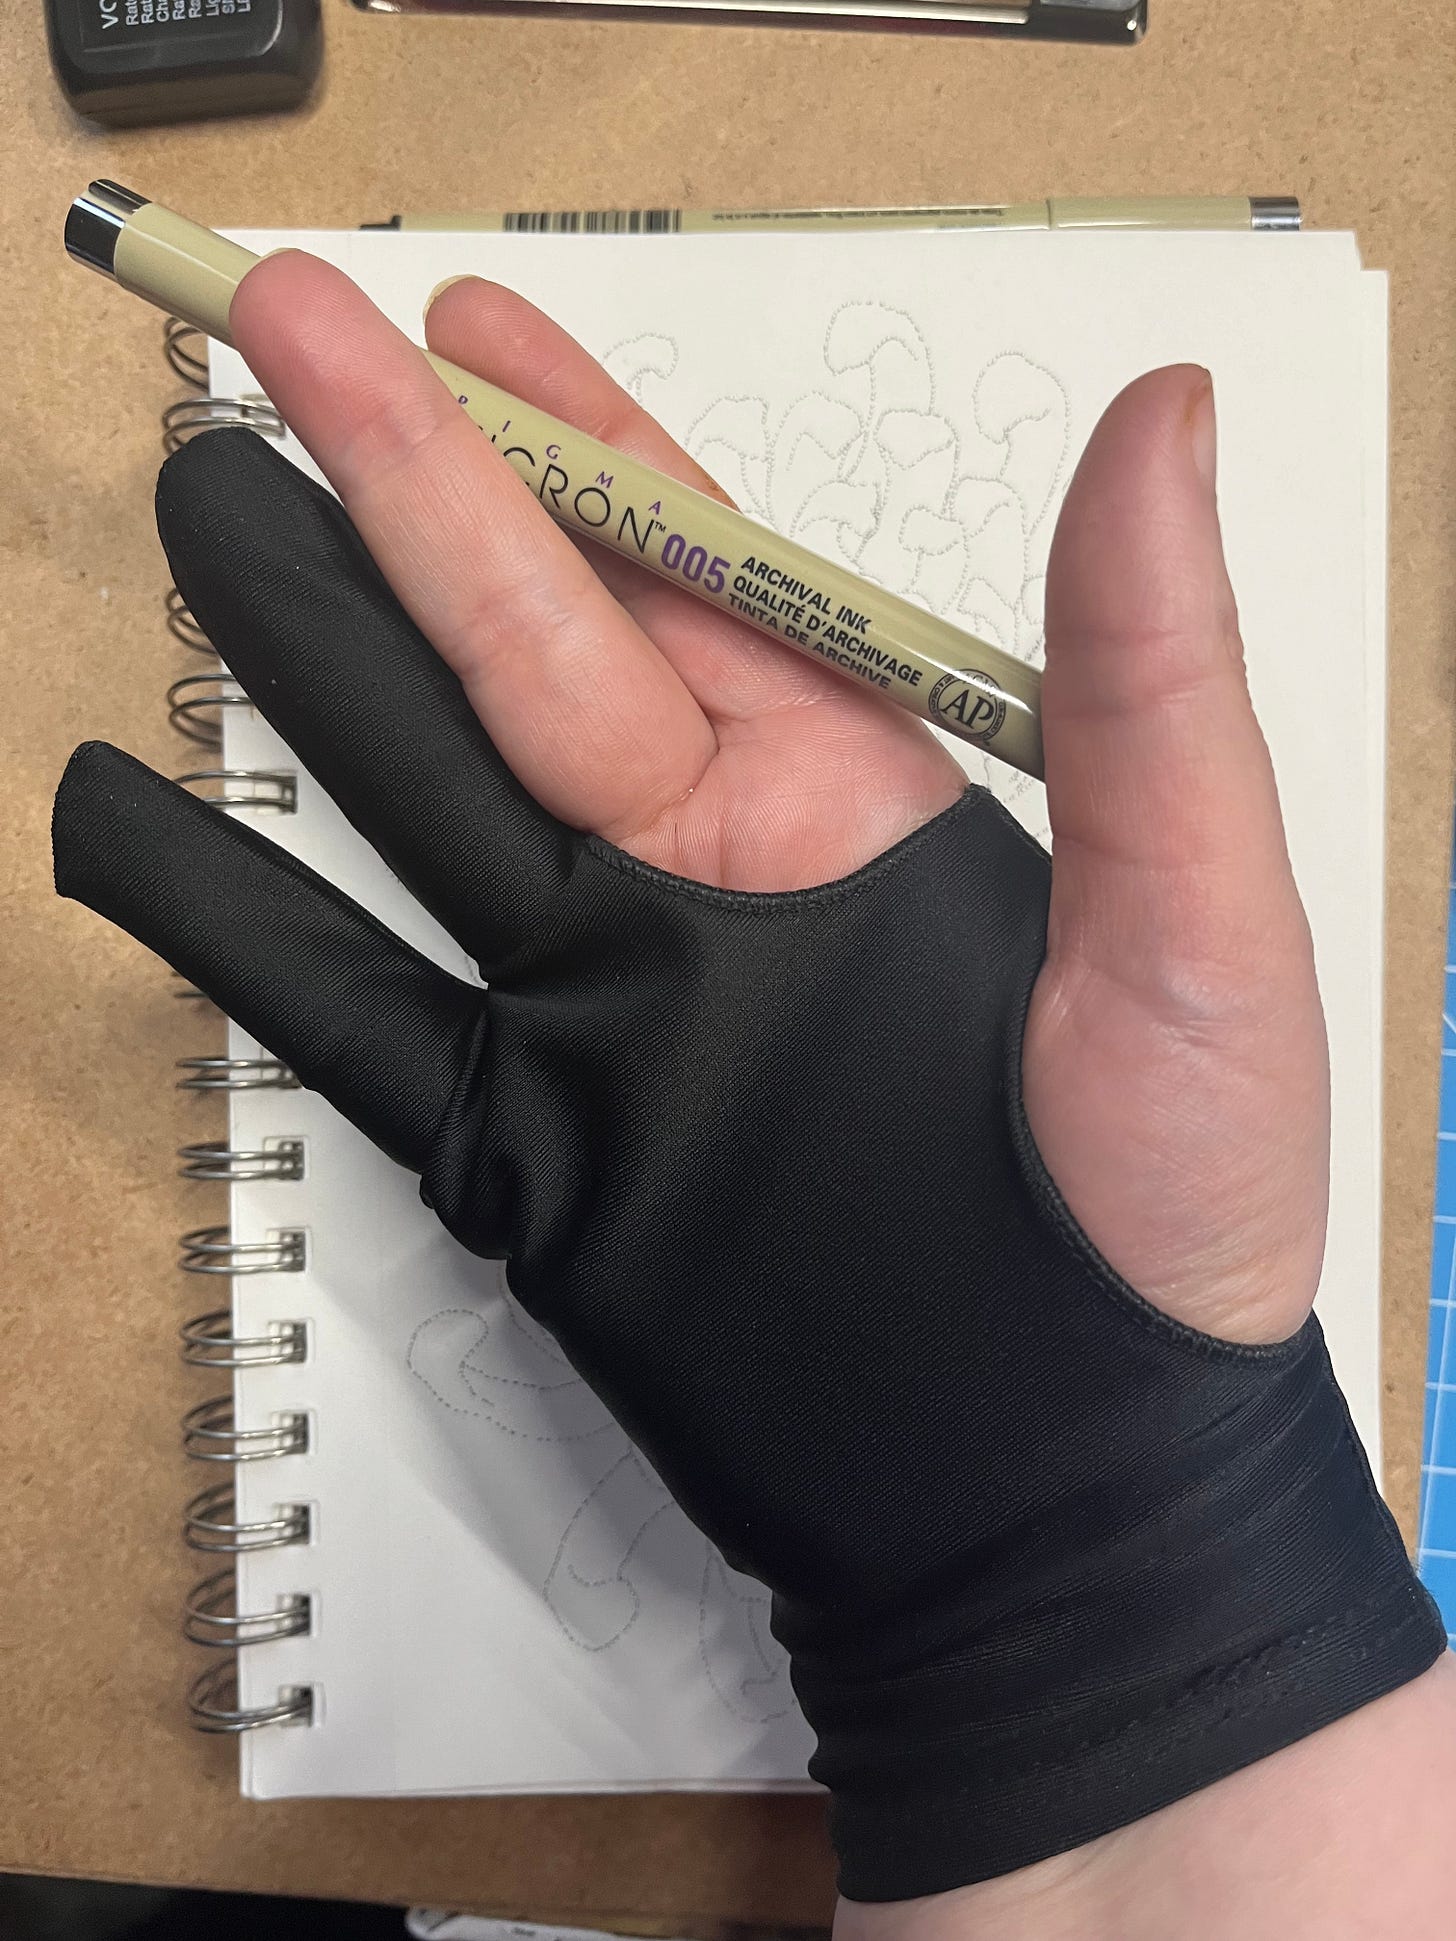
Once my outline is set up, I begin stippling in sections, working in one direction to avoid leaning on fresh ink. Since these pieces take far longer, I’ve run into the issue of my skin causing smudging and discoloration due to its natural oils. To avoid that ruining my hard work, I wear an art glove which has made a few people think I’m wearing a brace.
And that’s it. Once I feel the piece is done, I add my signature, snap a photo or two, and post it on my Instagram account. Eventually, I’ll get around to scanning my pieces and formatting them for prints so I can have them for sale in local shops, but I’ve been a horrible procrastinator with it because there always seems to be a more ‘important’ project to do.
Fellow Artists
I have a number of artists I draw inspiration from with my ink illustrations and I’d be remiss if I didn’t share them with you.
@blackvalorillustration - I am both inspired and humbled every time this artist posts. Especially because I know white pens are insanely hard to work with.
@birdcvlt - He’s since switched mediums and closed his print shop, but if you’re in the Portland, OR area and want an epic tattoo, he’s your guy!
@inkbyolivia - The ease in which she makes ink pieces, often posting daily, is awe inspiring. Check out her shop for prints, stickers, and more!
@melaniepetersonart - I adore her ink and wood burning pieces. Be sure check out her Etsy shop too!
@velillart & @jeromecoutyart - These are definitely accounts to watch every Inktober though they don’t tend to be active beyond that.
I hope you enjoyed this art talk on stippling. Feel free to share artists you like and any questions or comments with either a public comment or private direct message.
If you like my stories, please take the time to share my substack with your readers and friends.
Can’t wait a month for the next post? Check out my Story Index for more adventures!
Story Index
Since I’ve got quite a few stories posted in numerous parts I’ve decided to index them for easy reading. Click the titles to read part one of each story. Additional parts will be linked after each description. I’ve included links to my art talks below as well.


Nicely done!